Home Automation

2020 UPDATE: Staples/DLink abruptly discontinued service, making their product useless, and Wink abruptly started charging a stiff monthly fee to keep using their product…I don’t support crooked companies so I pitched both in the electronics recycling bin and won’t patronize either anymore.  I now use the Samsung SmartThings hub which works better than either of the prior products and does not involve a monthly fee.  You can read more about it in my Home Automation 2 post.

Several  years ago, we had a water leak in an upstairs bathroom that did a surprising amount of damage overnight.  We had it all repaired, but I resolved to put some automation in place so I would know much earlier if something was going wrong in the future.  I wanted a way to monitor my home remotely using my cell phone and to receive push notifications and an audible alert (even when I am home) if something’s going wrong.

I had experimented with home automation years ago using X-10 which was neat, but their current-carrier and wireless technologies weren’t quite mature enough and the system was problematic.  Technology has come a long way since then so I decided to try home automation again.

I didn’t want WiFi devices for a host of reasons including security, wireless range, and battery life, so I chose Z-Wave for the wireless technology and deployed a Staples Connect hub (made by D-Link).  That worked well for several years until Staples discontinued support; they handed support off to another company, but they are gone too and DLink won’t support it so the Connect Hub is now a $99 brick.  My lesson: don’t buy Staples branded products…and shame on DLink for allowing Staples to use their brand; I bought it because I trusted the DLink brand.

Fortunately, since Z-Wave is a standard, I only needed to replace the hub, not all of the sensors and controls.  I replaced it with a Wink Hub which is also multi-protocol (Z-Wave, Zigbee, WiFi, Lutron, Kidde,…). It was incredibly inexpensive ($34 on Amazon Prime), but I had some challenges getting it going (see below); it’s saving grace is that Wink tech support is the best I’ve ever encountered.  More than once during the first week of ownership, I was ready to ship it back to amazon, but each time, a call to support quickly solved my problem and left me enthusiastic about Wink; they answer the phone right away and their techs are patient, knowledgeable, and get the problem solved quickly; I’m impressed.  If it continues to work well, I’ll buy their newer Hub2.

I installed water leak sensors in the bathrooms and in the basement by the hot water heater and then added motion and door switches, light controls, door locks, etc..  The Z-wave devices work well, with long battery life, excellent wireless range, and very low latency.  So far I have the Wink hub working with:

As mentioned above, the Wink Hub has had some foibles too:

  • Initial Firmware Update was a bear; although my hub was brand new with a blue dot on the box, it needed to update its firmware and couldn’t do so using my access point.  Even though it was connected to the WiFi network (solid yellow light), it couldn’t reach the Wink servers (which would yield a solid blue light).  I eventually succeeded and it worked fine after that, but here’s what I had to do:
    1. turn off my wifi access point to force the hub to disconnect (blinking purple light)
    2. set up a cell-phone hotspot configured for 2.4GHz
    3. Run the wink app on another cell-phone and use it to configure the hub to connect to my hotspot and through it to their server (blink yellow->solid yellow->blink blue->solid blue)
    4. Allow the hub to download its new firmware (blinks all sorts of colors as it updates…when finished, it returns to solid blue).
    5. Turn off the hotspot to force the hub to disconnect (blinking purple)
    6. turn my wifi access point back on
    7. Use the wink-app to reconfigure the hub to use my access point wifi (blinks yellow->solid yellow->blink blue->solid blue)
  • Adding Devices: Initial paring of new sensors/devices can also be finicky; once a sensor is paired, it seems to stay paired and work well; the magic formula seems to be:
    1. use the wink app to put the hub in exclusion mode (blinking blue light)
    2. press the z-wave button on the new sensor once every second or two until the hub light turns green
    3. use the wink app to put the hub in incusion mode (blinking blue light)
    4. press the z-wave button on the new sensor once every second or two until the hub light turns green
    5. If the above doesn’t work, try power-cycling the hub and then trying again.
  • The Wink App: seems to stop working once in a while and I have to shut it down via Android and start it again.

Cheap Ultrabooks

Updated 8/2019: My daughter inherited the Acer CB3 and makes extensive use of it; I no longer have the Toshiba; it is still a great machine, but my over-50 eyes now need larger fonts than are rendered on a 13.3″ FHD screen.
—————————————–
I’m not a big fan of expensive laptops.  Computer equipment depreciates at a terrific rate and portable computers are subject to loss, theft, and damage so I want the least expensive machine that will do the job.  That said, I also want it to be compact, light, fast, and last all day on a charge (i.e. an ultrabook).  This may seem like a tall order, but I have found three solutions that I’m happy with.  All involve hacks:

Toshiba Chromebook 2

For MS Windows: The Toshiba Chromebook 2 Model CB35-C3350 has a Core i3-5015U with 4GB DDR3 and a 13.3″ 1920×1080 IPS display.  It’s meant as a Chromebook, but you can replace the internal SSD with a larger one (necessary for it to be useful and I had a spare 64GB M.2 drive on hand) and thanks to coolstar.org, you can install Windows, turning it into an excellent Windows ultrabook.  The main downsides are limited battery life (4-6 hours) and as I’ve gotten older, I find that 13.3″ screen is a little too small.  However, it is extremely portable, fast, sleek, and can regularly be found on eBay for $250-300.

Acer Cloudbook 14

Ultra-cheap-book: Ubuntu Linux: The Acer One Cloudbook 14 has only 2GB of RAM, a slow 1.6GHz Celeron N3050 processor, 14″ 1366×768 display, 64GB SSD, and 10 (real) hour battery life.  So other than the battery life, this is low-spec.  It’s woefully under-powered for running Windows and slows to a crawl as soon as you start doing anything with it.  Fortunately, it is better spec’d for Linux and once I loaded Ubuntu, it was surprisingly snappy and effective.  My old eyes appreciate the larger screen and the very long battery life makes it a great knock-around machine.  You can’t use it for for much software development: the big IDEs like NetBeans and Eclipse are too much for it, but most other apps run just fine.  It can often be found on eBay for $50-$100 and it’s tough to beat that for a thin, light, all-day laptop that’s practically disposable.

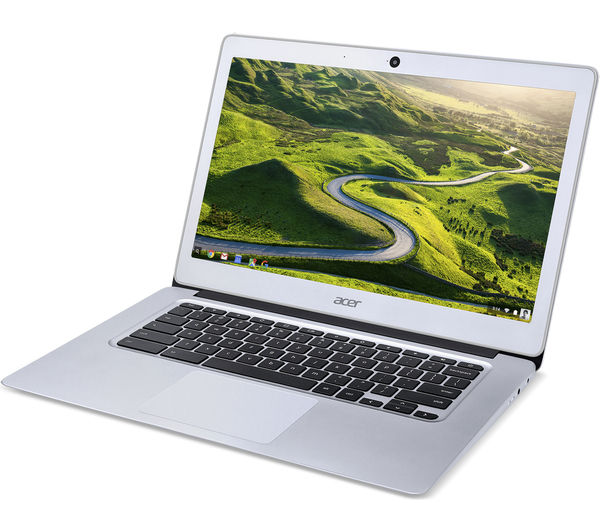
Gallium (Ubuntu) Linux: Last but not least is the Acer CB3-431 which is a 14″ Chromebook with a full HD screen (1920×1080), 4GB of RAM, 32GB eMMC storage and a quad-core Celeron N3160 1.6GHz processor; the case is aluminum and looks pretty snappy – an apple knockoff. This is my current carry machine.
Acer Chromebook 14

You can follow these instructions which use Mr. Chromebox to replace the BIOS and install Gallium OS (a great Ubuntu variant designed for Chromebooks) and turn it into a real linux laptop while keeping ChromeOS as a bootable option.  Because linux is relatively lightweight, even with LibreOffice, Slack, Thunderbird, Wine, EmBitz, Eagle, Oracle Java, NetBeans, Tomcat, Arduino, and a full gnu cortex cross development environment installed, I still have used only 50% of the Gallium root partition and it runs fast.  Battery life appears to be > 8 hrs.  Dual-boot has come in handy (it let me recover when a grub update prevented linux from booting) so I recommend it as well as setting the GBB flags as described in the instructions.

Note: if you update grub, it will ask you which partition to use: select the one that covers the entire disk (mmcblk0 I think), not just linux partition (mmcblk0p7).  If you select the wrong one (or both), it will not boot linux.  If you’ve dual-booted, you can reboot to chromeOS (ctrl D at startup screen) and recover.

If you are OK with (or prefer) linux on a light, inexpensive laptop, the Acer CB3-431 is a nice choice and is now the laptop I regularly carry.  It is commonly available “recertified” from vendors like NewEgg for $180 making it not quite disposable, but still very inexpensive. The main downsides are the non-expandable storage (32GB) and the lightweight processor, however I’ve found it extremely usable, all of my apps fit nicely and run at acceptable speeds.  Unfortunately, 1920×1080 is proving tough on my over-50 eyes, even on a 14″ screen.

So I’ve ended up with a Chromebook running Linux, another running Windows, and a Cloudbook running Linux…none of them running what they were intended for…weird!

What I’m still looking for is a thin laptop, less-than 4lb, 15.6″ screen with full HD, Core i5 processor, 8GB of RAM, 128GB+ of SSD, and 8hr+ battery life…for around $300.  Suggestions are welcome!

LG Ultrawide Monitor

There is no such thing as too much monitor…although I think I’ve come close this time.

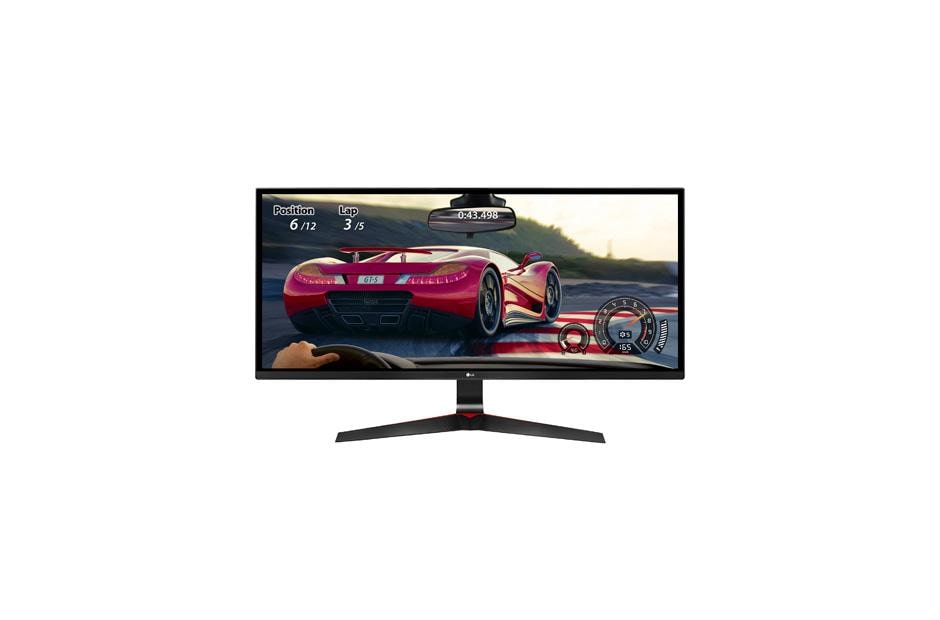
I bought an LG 34UM69G 34″ ultra-wide monitor for the office from amazon for $215 on Cyber Monday. It has 2560×1080 resolution and is indeed very very wide (21:9 aspect ratio). It’s taking the place of another high-def (QHD) monitor with a more traditional aspect ratio.

When I first saw the box, I worried that it might not fit on my fairly large desk, but I was pleasantly surprised; the ultra-wide monitor fits nicely and looks great. The panel itself had no dead pixels and is very thin with almost no bezel so it looks and feels smaller than the 28″ monitor it is replacing. The base is elegantly designed, feels solid, installs with no tools, and has good adjustments for height and tilt. The internal speakers are good enough that I’ll get the external speakers off my desk; the width helps with the stereo effect.

The full resolution is obtained using the included (but somewhat short) HDMI 1.4 cable and it even works with my ancient Zotac GeForce 210 video card (something that needs to be upgraded soon). Overall, this monitor is a winner and provides a lot of screen real estate without making the text so small that my over-50 eyes have trouble. I don’t think I’d want anything wider or higher resolution (as that would cause text to become too small). Recommended!

Bare Metal STM32 Development on Windows

It’s been a year and a half since I last posted on this and some new tools are available; they work great with STM32L1xx, STM32F1xx, STM32L4xx, etc.

  1. For an integrated IDE, I still like EmBitz
  2. When working from the command line, I still like vim for Windows
  3. For hardware-level debugging (JTAG/SWD), OpenOCD has dramatically improved their support for STM32 and is now better than the Texane STLink IMHO.  You can download windows binaries and the pdf manual or browse the online documentation.  OpenOCD is a GDB server that listens on:
    • port 3333 for a GDB debugger connection for source-level debugging
    • port 4444 for a telnet connection and sophisticated command line interface that lets you use commands like these:

      > stm32l4x unlock 0 (unlock flash bank 0)
      > stm32l4x mass_erase 0 (erase all flash)
      > flash probe 0
      > flash list
      > flash erase_address 0x08000000 0x3000
      > flash write_image myProgram.bin 0x08000000
      > reset halt
      > mdb 0x08000000 32 (dump 32-bytes at start of flash)

    OpenOCD supports many target processors and many hardware interfaces; when you launch OpenOCD, you must pass it two parameters that tell it which hardware interface to use and what target it will be controlling. For example:

    openocd -f interface\stlink-v2.cfg -f target\stm32l4x.cfg

    There are many pre-built configuration files in the interface and target sub-directories wherever you installed openocd. If your interface or target aren’t supported, the configuration files are text and can be easily edited to support your needs.

  4. GNU ARM Embedded Toolchain continues to be the best pre-compiled toolchain and is kept up-to-date.  It includes gdb which can attach easily to an OpenOCD server and let you do source-level debugging from its command-line interface and is well documented and there are many tutorials and cheatsheets.  An example of the CLI use is:
    arm-none-eabi-gdb <myApplication.elf>
    (gdb) target extended-remote localhost:3333
    (gdb) load myApplication.elf (loads image into flash)
    OR
    (gdb) file myApplication.elf (to debug an image already in flash)
    (gdb) set remote hardware-watchpoint-limit 6
    (gdb) b main
    (gdb) monitor reset run
    (gdb) c
    (gdb) step (s) or next (n)
    (gdb) i b (info breakpoints)
    (gdb) list [fnName]
    (gdb) interrupt (halt execution)
    (gdb) print <symbolName>
  5. Note: the ‘monitor’ command lets you issue any of the OpenOCD CLI commands from within GDB. For example:
    (gdb) monitor reset halt(reset target and halt target)

  6. Eclipse CDT (especially the standalone version) integrates nicely with gdb and OpenOCD and provides a friendly, smart, graphical source-level debugger.
    • On launch, select the appropriate .elf file for debugging at first dialog
    • Under Window->Preferences->C/C++->Debug->GDB set GDB debugger to arm-none-eabi-gdb (in the appropriate directory – you only need to do this once)
    • In a separate Command window, start OpenOCD with the appropriate interface and target (see above)
    • Under File->Debug Remote Executable: set Binary to the .elf file, Hostname to localhost, Port to 3333, check Attach (you should see gdb connect in the OpenOCD window)
    • In the bottom panel of Eclipse CDT, select the Debugger Console tab (accesses the gdb console)
      • file myProgram.elf (if the firmware is already running on the target)
        OR
      • load myProgram.elf (to program the .elf file into the target flash)
      • b main
      • monitor reset run OR
      • monitor reset halt
      • jump Reset_Handler
      • next
      • print myVariable
      • continue
    • From there you can step into/over lines of source code, browse variables and C and assembler source code, view/set/clear breakpoints graphically, and do everything you would expect from a modern debugger.
    • You can read more about it here.

Hybrid Smartwatch

For a long time, I resisted the urge to buy a smartwatch.  Most of them look like you’ve strapped a cellphone to your wrist,  they need to be recharged nightly, they require a button press or a wrist flick just to see the time, many aren’t waterproof, and most of the features aren’t appealing to me due to the small screen.  I tried wearing a fitness band and a regular watch, but wearing two things bugged me.

To the rescue comes the Withings Steel HR, a hybrid of an analog watch, a smart watch, and a fitness band in a nice looking package that is slightly smaller than my old watch.  I’ve been wearing it for several weeks now and I really like it.

The winning features include:

  • Small and light, no bigger than a normal watch
  • Professional appearance
  • Analog hands show time at a glance
  • Fitness dial shows steps at a glance
  • Heartrate monitoring
  • Waterproof
  • Bluetooth link to decent smartphone app
  • 3 week battery life for smart features, longer for watch and steps.
  • Full charge takes about an hour
  • OLED display covers the rest with a single button: date, steps, miles, calories, etc.
  • OLED and gentle vibration also alert you to incoming calls (displays caller) and text messages (displays from whom) and calendar events (displays event title), allowing you to decide whether you need to fish your phone out of your pocket.
  • Note: my eyes and I are over 50 so I was concerned about the size of the text on the small OLED display, but it turned out to be OK.

The watch comes in two sizes, I prefer the smaller (36mm) variant; it includes a black silicone band that is very comfortable and secure, but I am used to a stainless band; fortunately, this watch takes any standard 18mm band so I bought a nice looking replacement on eBay for $10 and it fit perfectly.

It’s not yet officially available in the US, but it will be soon, you can read more about it here.

I still don’t understand why we don’t see old-fashioned LCD or modern eInk smart watches that show the time continuously and run for years on a coin cell, but for whatever reason, we don’t and for now, this is the best solution I’ve found.  Other features I’d like to see in the future:

  • blood pressure monitoring
  • display text of messages (not just who they are from)
  • saphire crystal and/or better protection for the crystal like a standard dive watch

10/24/2017 – A new contender is the Amazfit BiP or the snazzier Amazfit Pace. The BiP has very long battery life (45 days) and the Pace has much less (~5 days) but looks better, both are waterproof, have fitness monitor, GPS, smarter watch features, low price, and always on display. The only down-sides I can see are appearance/size: both are large and considerably less attractive than the Steel HR (the Pace looks better, but the battery life is too short). You can see a video review of the BiP here. When they make one that looks like the Pace but has the battery life of the BiP, I’ll buy one.

3D-Printer: Cube 3

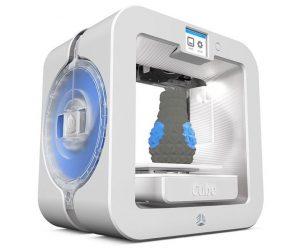
I finally caved and bought a 3D printer: the Cube 3 from 3D Systems and so far I’m pretty happy with it.  See the manual here. The hardware is high quality, it’s easy to use, has dual-extruder jets, and looks pretty sharp.  In some ways it is like an Apple product: a beautiful, but closed eco-system: the main down-sides are that it uses proprietary software and requires proprietary filament cartridges which cost more andsee update below are limited to  PLA and ABS (the most popular material choices); other “cons” are that it isn’t fully enclosed and it doesn’t have a heated base which diminishes its performance with ABS and seems odd for a printer at the $1K price point.

I decided to get this for two reasons:

  1. I have an enclosure I need to prototype and I’m a beginner at 3D printing.  I’d read about folks spending a lot of time getting their printers working in the first place and then keeping them working including constant parts replacements.  The Cube 3 reviews indicate it is good for beginners and I want to focus on learning 3D mechanical design and printing instead of fighting with the tools.
  2. The Cube 3 has been discontinued and is available at fire-sale prices, sometimes under $200 shipped on eBay including two cartridges.  That’s an amazing price for a well-made printer and unheard of for one with dual-extruders.  At that price, it’s a no-brainer: if I start doing enough 3D printing for the cost of filament to become an issue, I’ll buy another printer and have gotten my money’s worth.

I’ve printed many objects in PLA which have come out nicely.  PLA seems to be the go-to material for 3D printing; it is very strong but brittle, has good dimensional stability while printing (doesn’t shrink much as it cools), and has no smell when you print.  I’ve also printed a couple of objects in ABS and they came out nicely although there was some mild warping at the base (because the platform is not heated). I printed a thin sheet of ABS too and it is remarkably flexible.  There is a slight smell of melting plastic with ABS, but in my basement (big space) it was barely noticeable and certainly not a problem.

Overall, I’m very happy with the purchase and am enjoying 3D printing.

Update: After having used the printer for a while, I still think it is a marvelous piece of engineering, but there are some serious problems with the cartridges.  I don’t mind paying more for the proprietary cartridges – I understand the 3D Systems business model, but  after my 8th cartridge failed, I was no longer sympathetic.  Since 3DSystems has discontinued these printers and abandoned the low-end/hobby market, they should really open the architecture so existing customers can make better use of them.  Fortunately, I have found ways to overcome these issues and will share them below:

  • Adjust the printer ‘z’ gap (the distance between the platform and the print nozzle) periodically.  You do this from the front panel using a provided feeler strip; it doesn’t take long.   You should adjust the gap until the feeler just barely slides beneath both nozzles with some friction between the platform and the lower nozzle.  Having the gap a smidge too wide is better than too tight.  If you are experiencing failure of filament to flow/jammed nozzles, the Z-gap being too small is almost certainly the problem.
  • Don’t be afraid to repair or refill the cartridges.  See how to do it here.  The top cover snaps off; it takes a lot of force, but the cover doesn’t break; 3D Systems advises this in their Advanced Cartridge Reset Guide.  Inside is a spool of filament with a clever latch to keep it from un-spooling when not mounted in the printer and a simple but effective feed mechanism.  Filament passes between two gears that grip the sides and push it forward or backward.  You can manually advance/withdraw the filament if it is broken using a Robertson (square) or Torx T20 screwdriver inserted into the feed mechanism drive (where the printer drives it).  Note that you can only do this when the filament is broken (which happens sometimes); otherwise, keep in mind that the end of the filament is melted into the tip of the nozzle and if you try to withdraw it the filament will break and problems will ensue.
  • Don’t be afraid to repair the nozzle.  The nozzle is a two-piece snap-together assembly that can easily be opened by inserting a screwdriver in the crack near where the nozzle assembly starts and the feed tube stops and prying forward (away from the feed tube).  You can repair a nozzle clogged with PLA by raising the temperature of the nozzle until the PLA softens and the nozzle tip slides off the tube; see here.  Be careful not to pull too hard or you’ll break the plastic feed tube.  If you have one, a hot air workstation (or perhaps a hairdryer) is a great way to heat the nozzle; if not, you can let it heat up in boiling water.  If you do any work with modern electronics, you should have one of these.  I set the hot air to 130-140C and heat the metal nozzle until it slides off the PTFE tube; I hold the nozzle with tweezers or needle nose pliers while it heats applying *very* gentle pressure; it should slide off the tube easily.
  • There are firmware hacks that allow you to use non-proprietary filament; this works, but you use it at your own risk: see Cube Toolbox.  A video showing how to use it is here if needed.
  • I find the cartridges sufficiently unreliable that I no longer use them as intended; I remove the filament spool and put it on an external spool holder.  I leave the cartridge cover off and feed the filament into the bottom of the extruder assembly and I hot-glue the portion of the PTFE sheath that fits into the cartridge edge so that it stays in place even with the cartridge open.
  • Finally, filament absorbs water from the air and becomes brittle and problematic.    This is not a problem specific to this printer, it affects all FDM printers.  Once opened, filament needs to be stored in a sealed airtight container, preferably with some desiccant.  To fix old filament, that has already absorbed moisture, I put the filament in a food dehydrator overnight at around 130F.  When filament is not being used, I store it in a ziplock bag with a few desiccant packets which I then put in an airtight container such as an ammo box (available at Sams and Costco).  For storing more filament, I use a bucket with screw-on cover and silica gel kitty litter for desiccant.

I haven’t yet tried it, but someone has made an enhanced feed mechanism for supporting other filament types; see here.  There is an even simpler method that I intend to try here. that uses

If you want to refill a cartridge, there is a filament winder apparatus here with video showing its use here.

Some Cube 3 resources:

Orange Pi

I bought two Orange Pi single board linux computers: an OPi One and an OPi PC. Getting up and running took me a lot of time, but once you know how, it’s easy peasy. The main issue with the OPi is lack of documentation, particularly from the manufacturer whose website is often down or slow as molasses.  There are some other sources of information including orange314

I’ll describe what you need in this post so you can have a smooth out-of-box experience. Documentation for these boards is lacking, but there is an extremely active user community and most of the negative reviews and comments you’ll see about the OPi no longer apply. You will need the following:

  • Good 5v/2A power supply with 4mm x 1.7mm DC barrel jack (same as used on Sony PSP)
  • 8GB or larger Class 10 or better microSD card
  • Ethernet cable and connection
  • Recommended: HDMI cable and monitor
  • Recommended: USB keyboard and mouse
  • Optional: USB-to-TTL-Serial adapter

I’ll describe these in more detail below:

POWER SUPPLY: The Orange Pi requires a 5V/2A good quality power supply. The power input is a 4mm x 1.7mm DC barrel jack (same as Sony PSP and many other devices). You cannot power it through a microUSB cable like a Raspberry Pi; you have to power it through the 4.0mm x 1.7mm DC power jack. I made the mistake of buying a really cheap after-market power supply meant for the Sony PSP and had lots of trouble because the power supply was too noisy; others have had similar problems. Get a good power supply like this one from LoveRPi or a microUSB to barrel jack adapter if you want to use a good existing micro-USB 5v/2A supply.

MICRO-SD CARD: There are a zillion Linux (and Android and other OS) distributions for the Orange Pi, but many of them are hard to install or missing important capabilities. I spent a lot of time sorting through them and ultimately installed ARMbian Linux (Debian Jessie Server) using Rufus onto a Samsung EVO 16GB Class 10 micro-SD card. I plugged in the uSD card, Ethernet, HDMI monitor, USB keyboard, and power, and my Pi was up and running (fast)! There was lots of space left over on the 16GB card; even an 8GB card would leave plenty, but try to avoid slow cards (e.g. don’t use Class 6). ARMbian is a great distribution that is pre-configured for the OPi PC; everything worked out of the box; my network connection came right up using DHCP and I could ssh into the OPi.

USER INTERFACE: The intended user interface is an HDMI monitor and a USB keyboard (and mouse if you are installing the desktop/GUI version). If you are technically inclined, the other thing that’s very useful is a USB-to-TTL-serial cable so you can access the serial console. 115200bps, 8, N, 1, Pin 1 on the 3-pin header is ground. Accessing the serial console lets you see what’s happening very early in the boot process; when booting is complete, you can login there as well. A tiny USB serial console is a lot smaller to carry in your laptop bag than a monitor and keyboard.

OTHER USEFUL TOOLS: You may also find SDFormatter useful for erasing/reformatting SD cards.

COOLING: ARMbian runs the CPU pretty cool; it rarely got more than slightly warm to the touch. However as I was experimenting with different linux distributions, some would get the SoC very hot very quickly. Self-adhesive heat sinks are very inexpensive and probably worth adding, at least one on the H3 SoC.

CONNECTING TO PROJECTS: If you plan to connect your OrangePi to some custom electronics, WiringPi has been ported to the OrangePi and I was able to have it blinking LEDs within a couple of minutes. If you need them, instructions are here and for more info see here.  If you follow the steps I mentioned above, you should be up and running quickly. Good luck and have fun!

JavaCV (OpenCV for Java) on Raspberry Pi

The Raspberry Pi has a powerful processor and GPU making it one of the few low cost embedded platforms suitable for machine vision and video processing.  The OpenCV computer vision library is popular for C++ development.

Update 11/25/2017:
Benji found JavaCV too limited in that it used OpenCV 3.0.0 and old/poorly documented ‘C’ APIs where the newer documentation is all focused on C++. He built OpenCV with the Java bindings from source on an RPi3 using the latest Raspbian; you can read about it here

JavaCV uses JavaCPP to automatically construct JNI wrappers around the CPP OpenCV classes.  The port was done by Samuel Audet and you can read about it here.  Good sources of documentation are the OpenCV documentation and the JavaCV wiki.

The Raspbian repositories don’t have up-to-date versions of either OpenCV or JavaCV so you’ll need to install them yourself:

  1. The easy way:
  • Download the 4 pre-compiled binary .jar files here  (source page: here) or from this site: javacv-1.0.jar javacpp-1.0.jar opencv-3.0.0-1.0.jar opencv-3.0.0-1.0-linux-arm.jar
  • To test:
    • put them in a folder such as “./opencv”
    • create this test program:

      import static org.bytedeco.javacpp.opencv_core.*;
      import static org.bytedeco.javacpp.opencv_imgproc.*;
      import static org.bytedeco.javacpp.opencv_imgcodecs.*;

      public class Smoother {
      public static void smooth(String filename) {
      IplImage image = cvLoadImage(filename);
      if (image != null) {
      cvSmooth(image, image);
      cvSaveImage(filename, image);
      cvReleaseImage(image);
      }
      }

      public static void main(String[] args) {
      if (args.length > 0) {
      smooth(args[0]);
      }
      }
      }

    • Compile (note: the binary .jar files were build w/Java 7 so you must target java 7 for your bytecode too):

      javac -source 1.7 -target 1.7 -classpath “./opencv/*” ./Smoother.java

    • Execute on a sample image file; the output will overwrite the file with a smoothed version of the image:

      java -cp opencv/*:. Smoother Rough_piddock_BW.jpg

2. The hard way…build it all from source while wrestling with gobs of dependency issues:

  • OpenCV 3.1 install instructions are here and here.
  • You will need to install many dependencies including maven, ant,  and doxygen.  You can read about the dependencies for JavaCV and JavaCpp by following install instructions here or here


NOOBS on Raspberry Pi

Notes on setting up NOOBS (Debian Linux) on a Raspberry Pi

  1. Download NOOBS linux (offline version) from here and copy all of the files in the .zip to the root of an SD card
  2. Boot the SD card with a monitor and keyboard attached to the Pi
  3. Use the Pi GUI to configure the WiFi network (if desired)
  4. Configure the Pi to use a default IP on the Ethernet interface that’s on the same subnet as the PC auto-IP subnet (169.254.x.y) – I used 169.254.82.80 (‘R’.’P’); this will let you boot the Pi headless, connect it to the Ethernet port of your PC, and ssh into it with no other hardware.  To do this, modify the file /boot/cmdline.txt and add “ip=169.254.82.80” to the end of the single long line.  See details here.
  5. Login (default user is ‘pi’ and default password is ‘raspberry’)
  6. sudo apt-get update
  7. sudo apt-get upgrade

Bare Metal STM32

Periodically I have to bring up a new device and my current favorite processor line is the STM32 Cortex ARM processors from STMicroelectronics.  When bringing up new hardware, JTAG debugging (or similar) is immensely useful and ST provides tools to make that easy including:

    • ST-Link V2 hardware debug interface – you can buy an official ST-Link V2 for $23 from Digikey or elsewhere or purchase a nicer clone on eBay for $3.25.  ST evaluation boards such as for the STM32L476 Discovery or STM32F4 Nucleo (with mBed support too!) cost $10-20 and include an ST-Link on board that you can disconnect from the evaluation processor and connect to your target via the SWD connector and by removing the two ST-LINK jumpers.  You’ll need to connect the SWD connector to Vcc, Gnd, SWCLK, SWDIO, and NRST on the target.
    • Use the GCC ARM Embedded development tools to build your software.  Build an .elf with debug information and a .hex file for programming.
      • For Ubuntu platforms see here for installation via package manager.
    • Use the ST-Link utility to flash your .hex file to the target using the ST-Link V2
    • Use Texane STLink to make your target debuggable via the ST-Link V2 and GDB (see this post for details on linux setup for texane)
    • Debug, by running the texane STLink utility and you should see something like this:

STLINK GDB Server v0.5.6 (Mar 24 2013 10:29:19)
Many thanks to the STLINK development team.
(https://github.com/texane/stlink)

2016-02-29T16:18:14 INFO src/stlink-common.c: Loading device parameters….
2016-02-29T16:18:14 WARN src/stlink-common.c: unknown chip id! 0x10036415
Chip ID is 00000415, Core ID is  2ba01477.
KARL – should read back as 0x03, not 60 02 00 00
Listening at *:4242…


  • Launch gdb for your executable, connect to the target, and start debugging:

arm-none-eabi-gdb myProgram.elf
(gdb) target remote localhost:4242
(gdb) break main
(gdb) continue


  • GDB has a huge set of commands; see the manual here .  For example:
    • step  (or ‘s’)                (step through one source line – steps into functions)
    • stepi (or ‘si’)                (step through one assembly instruction)
    • next (or ‘n’)                  (step over a function)
    • break *0x8004060       (set breakpoint at address)
    • break main                  (set breakpoint at function)
    • info breakpoints          (or info b)
    • del 3                            (delete breakpoint # 3)
    • info registers
    • info reg $r3
    • p <variable_name>   (print value of variable)
    • p/x  $r3                       (print value in register r3 in hex)
    • list                               (list source code)
    • disassemble              (disassemble around current PC)
    • display $pc                 (show value in program counter with each step)
    • display/i $pc               (disassemble code at program counter with each step)
    • display/20i $pc           (disassemble 20 lines starting at pc with each step)
    • x/20i *0x08004060      (disassemble 20 lines starting at address 0x8004060)
    • x/20xw $sp                 (dump 20 longwords from stack)
  • Note that a watchdog interrupt will appear as a SIGTRAP